If you love some physically and mentally challenging hikes, you’ve met your match. Mt. Olomana, also known as Three Peaks, is one of the most difficult hikes to complete on O’ahu. If you’re visiting Hawaii, make sure you know what you’re doing before you embark on this adventure.
This hike is for CONFIDENT HIKERS only – if you feel uneasy about narrow ridges, rope climbing, and heights, don’t go past the first peak. People die here all the time. It’s not worth it.
If you’re looking for some less risky hikes, best to sift through the other guides for ideas.

Not too confident about this one?
Consider Aiea Loop Trail!
Nice and easy on a dry day, no scrambling involved.
With that being said, if you are a confident hiker and you’re adamant about conquering Three Peaks with a friend, here’s what you have to know.
About the Trail
- Location: Kailua – off of Auloa Road near Royal Hawaiian Golf Club
- Length: 4.7 miles total
- Fear Factor: High
Starting the Hike
You’ll park on Auloa Road and walk past the golf club entrance. Along the way, you’ll see the trailhead marked off to the side. It’s clearly marked, so you can’t miss it.

As soon as you start the hike, you’re going straight uphill. It doesn’t stop until you get to the top of the first peak.
Doing the Hike
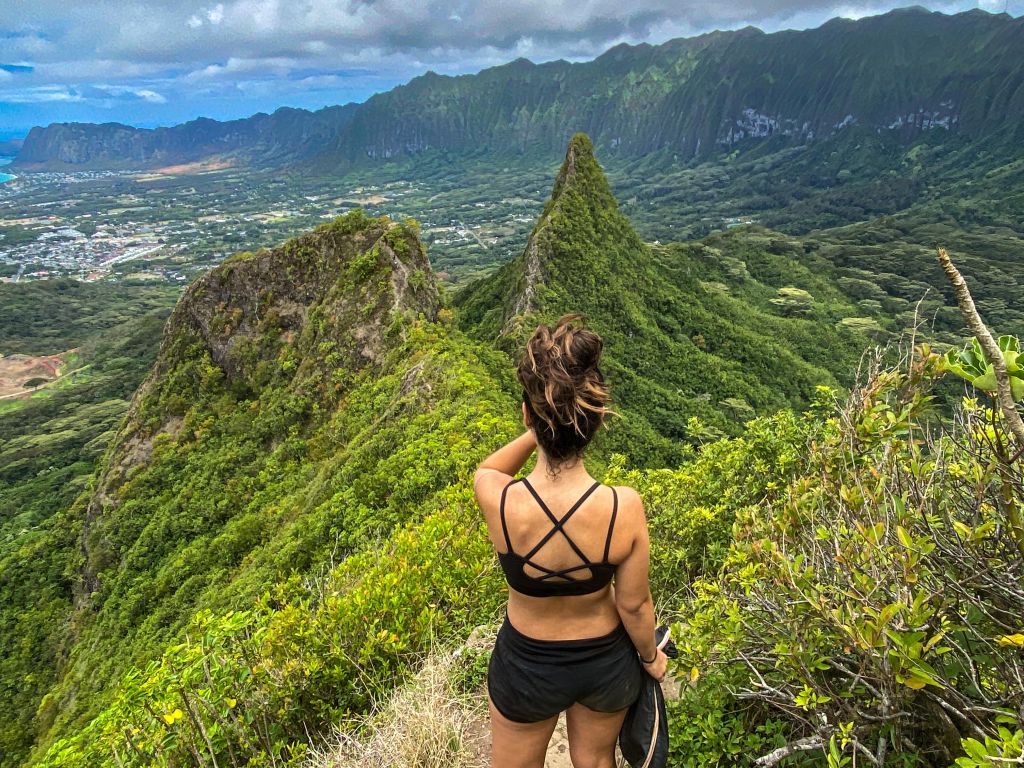
The hike is mostly covered at first. There’s a lot of forest along the way to provide shade while you’re literally climbing the side of the mountain. You get some cool views on the way up, but there’s really nothing like the views from the first peak.
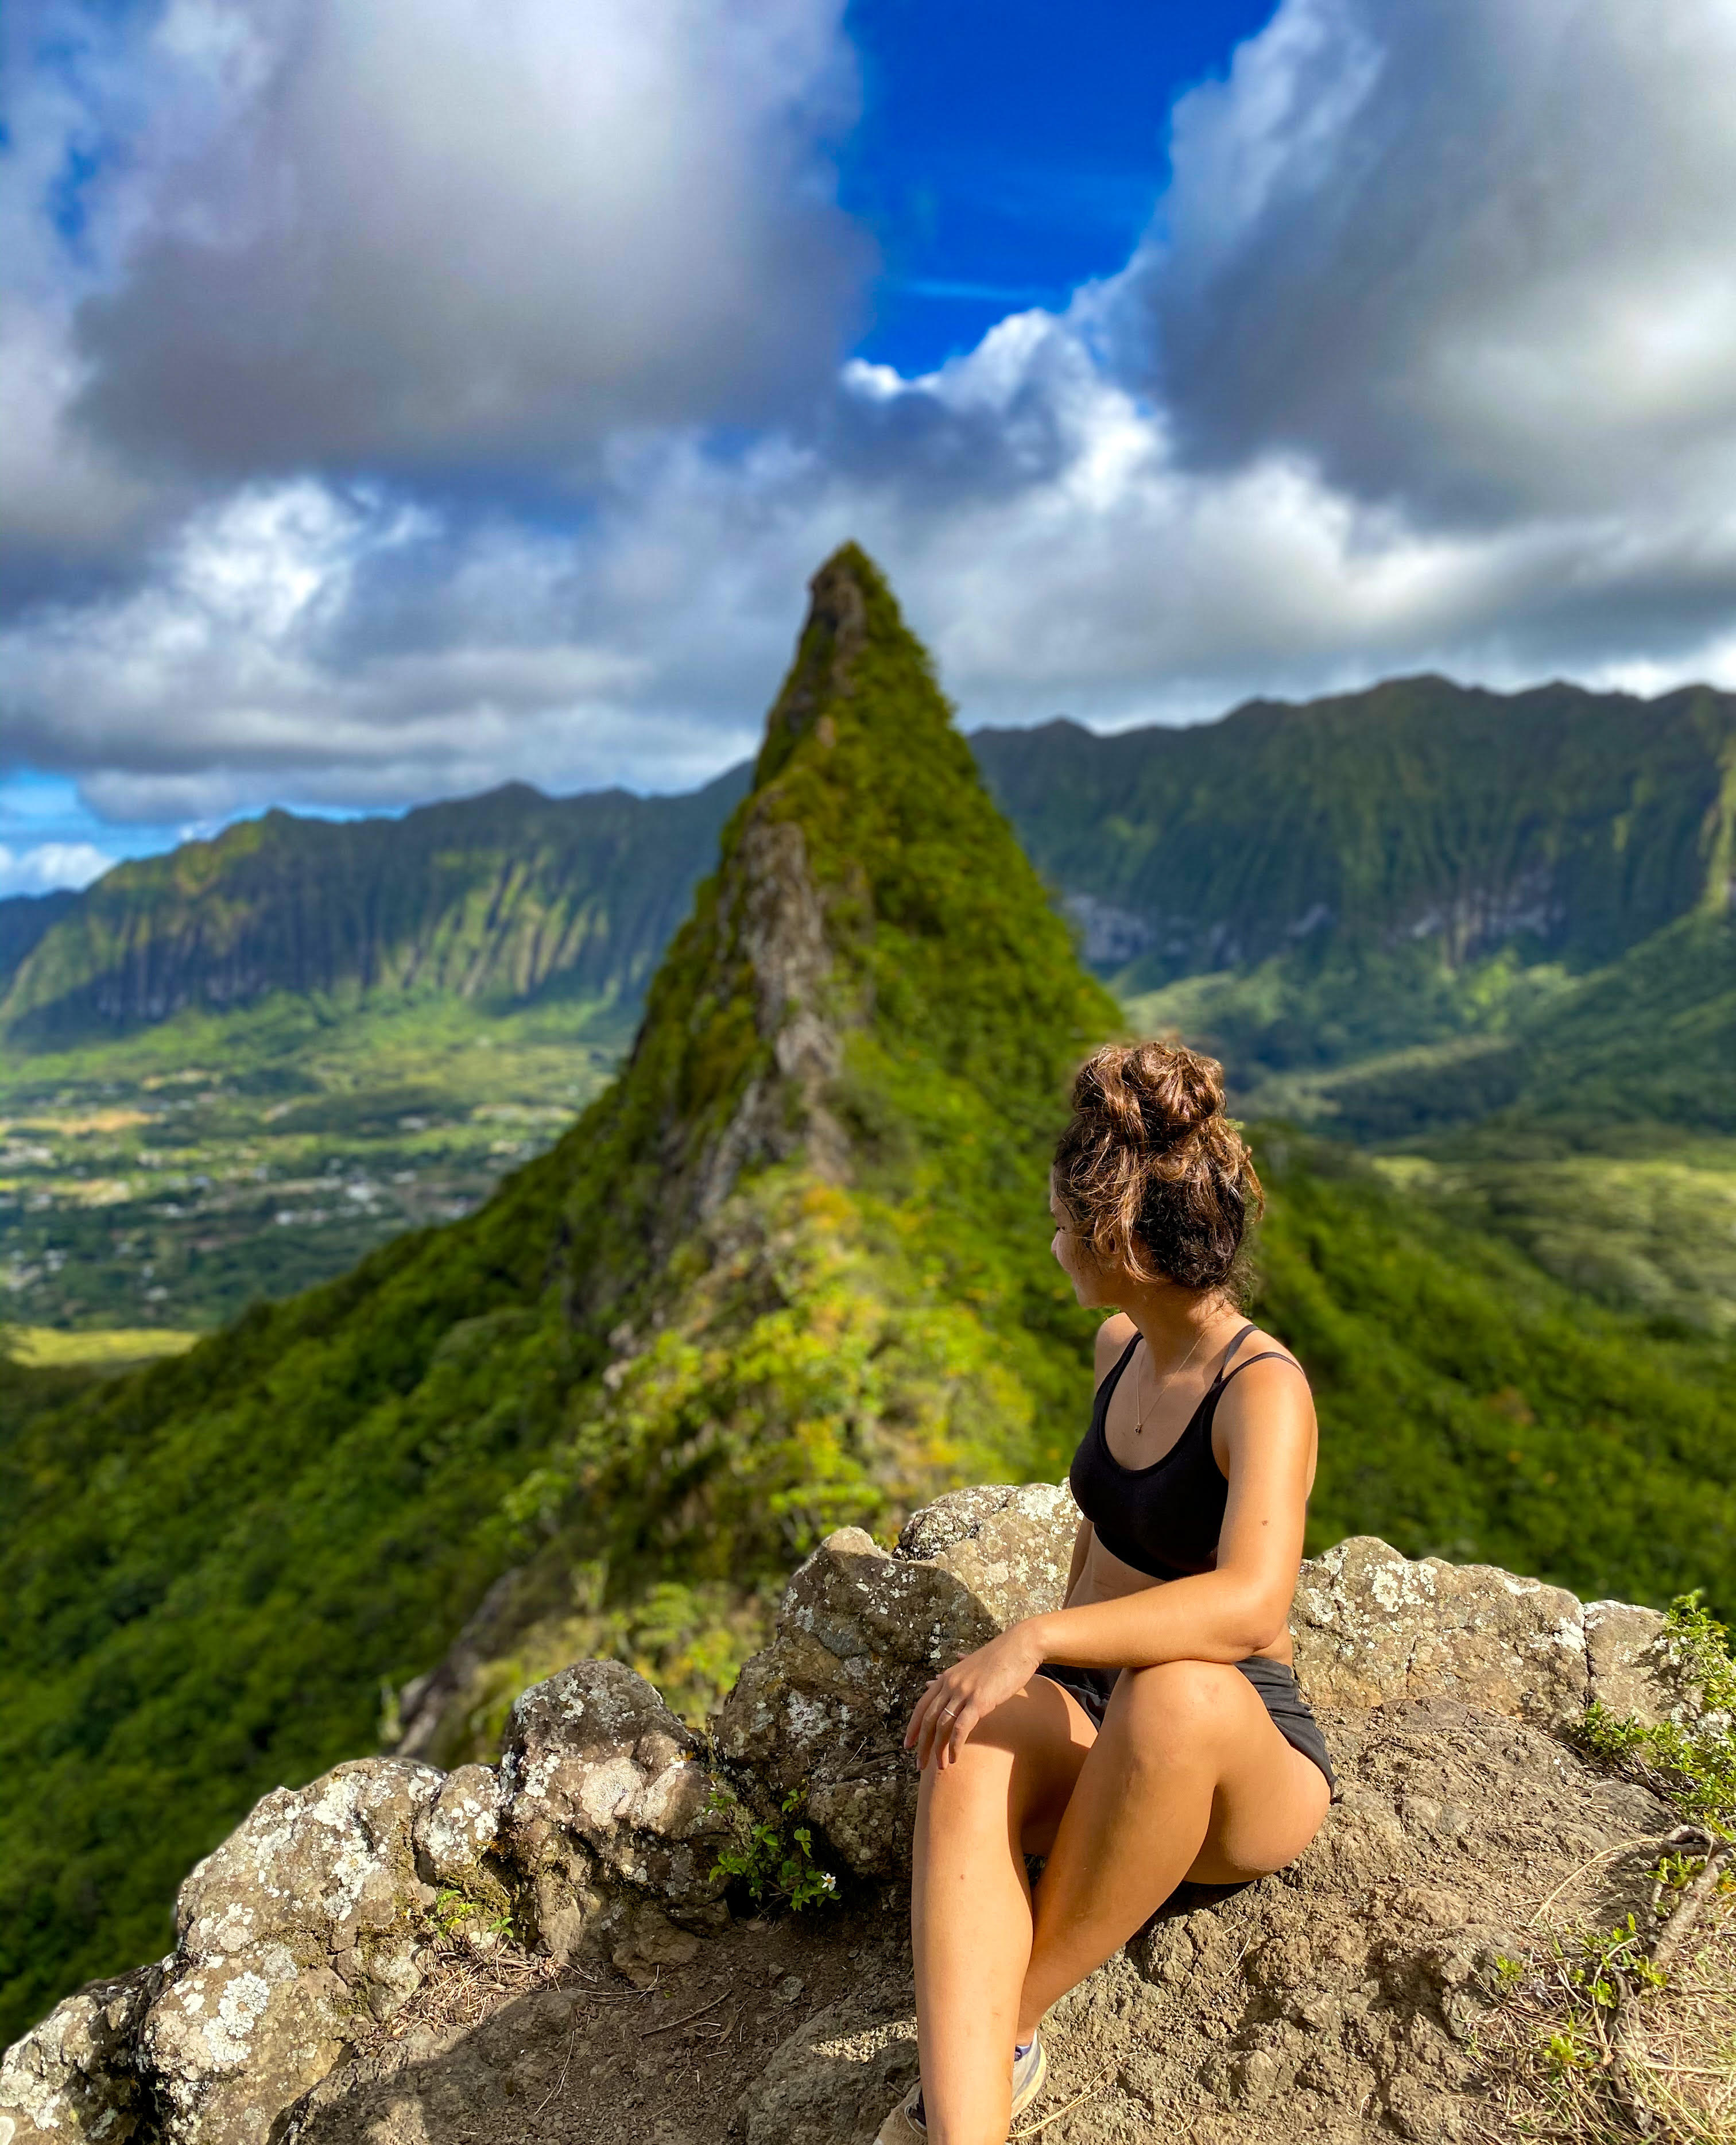
After about 1.5 miles, you’ll reach the summit of the first peak. All the best views are on this peak, so if you don’t plan to continue to the second or third, you’ll only miss out on bragging rights.
But, if you do keep going, you get to traverse this:
Make sure you take a second to acknowledge how STEEP that path seems behind the second peak. I can confirm that it is, indeed, steep as fuck.
The second peak is where the hike starts to get very interesting. That section behind the second peak requires climbing down a cliff face with ropes that are already installed. There’s no way around it. You have to trust the ropes.
We did freeze up a bit on the way down, but once we did it, we realized it wasn’t as bad as it seemed. You can take comfort in that it’s much easier to go back up when you’re returning.
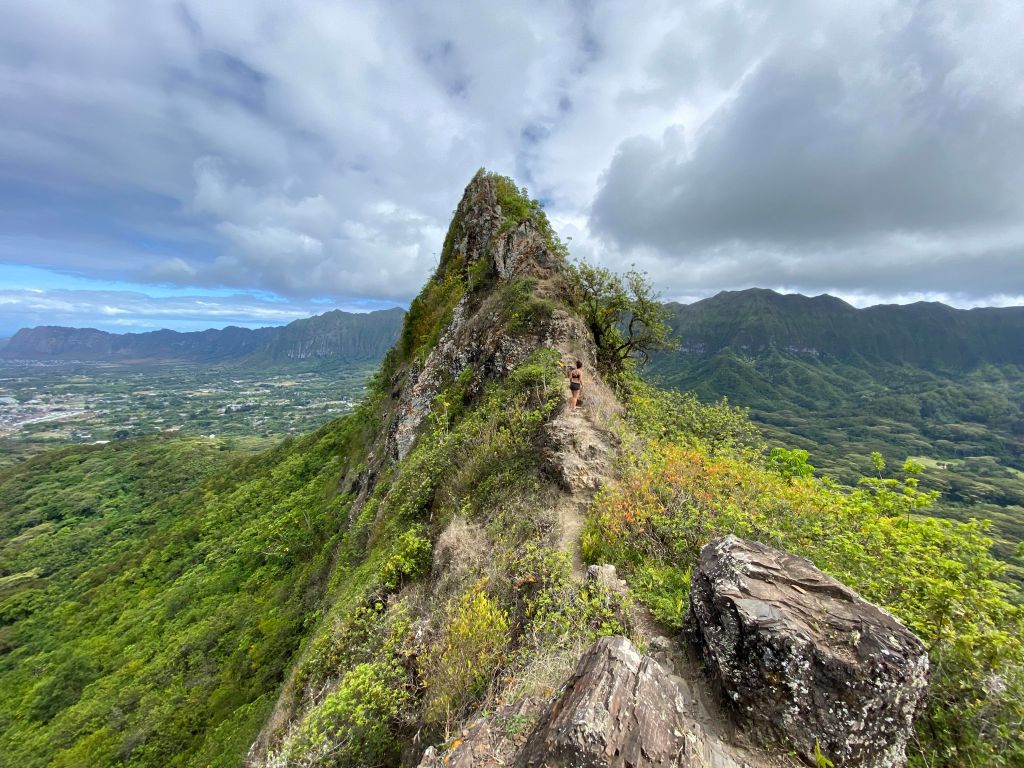
Then, you start your ascent up the infamous third peak.
The Third Peak
The third peak is usually where the deaths happen. If you refer to those pictures, you can see how the path drops off on either side. It’s incredibly steep with almost nothing to hold onto.
And yet, we trudged onward.
The first major obstacle you’ll hit is the arch along the path.
The arch sits just before the path starts to incline for the third peak. The only way past the arch is to hike around it. The path was so narrow, you literally have to hug the rock as your passing around it.
The next obstacle is really a series of obstacles – exposed rocks and ropes.
When we did this, O’ahu was having a dry spell. The rocks were very dusty which made it difficult to gain traction. The same problem happens when the hike is muddy and slippery. Either condition is really difficult to overcome.
As we hiked up the third peak, we hit a pile of large rocks with absolutely no footholds. The dust made it almost impossible to grip the surface with our shoes. Then, as we’re trying to figure out the next move, we see that someone had left the climbing rope to the side of the rocks off the cliff. There was absolutely no way to reach for it without risking our lives.
So, we turned around. We didn’t finish the hike, and we’re 100% okay with that.
If you do hikes like this, you have to know where your own limits are. So, if you go to the third peak, don’t be ashamed if you can’t finish it. Besides, the best views were at the first peak!
Going back was much easier, even though we did feel a bit defeated. But that’s okay! The most important thing is to stay safe.
Enjoy the hike, but most importantly, be safe out there!

Looking for more travel inspo?
Wander off the beaten path to Bulgaria.

Leave a comment